Trampoline dismantling is the opposite of trampoline installation. However, dismantling a trampoline is easier and takes less time than putting one together. There are a few reasons why trampolines must be removed. In certain situations, laying down a trampoline is a cause to extend the trampoline’s lifespan. You must learn how to disassemble a trampoline as a trampoline user.
There are various trampoline disassembly services accessible, but you must learn how to do it yourself to prevent dangerous circumstances. As a result, we’ll share our trampoline disassembly expertise. Continue reading if you’re looking for detailed instructions.
Why Is It Necessary To Disassemble A Trampoline?
You don’t need to disassemble the trampoline if you live in a tropical or year-round moderate environment. You won’t have to worry about trampoline disassembly or reassembly in this scenario. To keep it running well, you only need to provide some simple care and maintenance.
If the weather is particularly extreme, such as scorching summer heat or heavy snow, you should winterize your trampoline and keep it in a secure location to extend its longevity. Before approaching storms or hurricanes, the deconstruction procedure is also beneficial. It will be profitable because the trampoline will not blow out.
Extreme cold and damp conditions can cause rust to develop in the frame and springs, causing them to degrade quickly. Snowfall is a threat for the mat as well. Similarly, hot summer conditions might cause the trampoline to break down prematurely. Because of these circumstances, the trampoline is both hazardous and unsightly. You may remove the pieces and store them inside to get rid of them.
When you wish to transfer and relocate your trampoline to a secure location, the disassembly procedure will come in handy. When you wish to sell your trampoline, you’ll need to disassemble it. Trampoline disassembly is carried out for these reasons in order to save money.
So, let’s learn how to correctly dismantle a trampoline for the winter or summer.
Getting Ready to Dismantle Your Trampoline
When disassembling your trampoline, make sure you have a large container to hold all of the springs, netting, and other tiny objects.
By putting these materials in a pre-determined container, you’ll be able to streamline your assembling procedure.
If any components are missing, do not attempt to assemble the trampoline or safety equipment.
Taping the trampoline’s major sections together may be an efficient technique to ensure that no large components are lost. This will keep the major components together and make transporting them easier.
Other objects should not be allowed to rest on the components. Keeping the components in a secure position will protect them from harming other large things in the area.
Softer components, such as safety cushions, netting, and trampoline tents, should be wrapped or covered for long-term storage to keep insects and animals from gnawing or nesting in them.
Tools Required for Trampoline Disassembly
Trampoline disassembly is a time-consuming operation that needs your undivided attention. However, you should have some tools in your garden to disassemble it. These tools will simplify the process for you. We feel you should have all of the necessary tools because they are the same ones you used to assemble the trampoline in your garden.
The following is a list of the tools and items needed to disassemble a trampoline:
- Hand Gloves
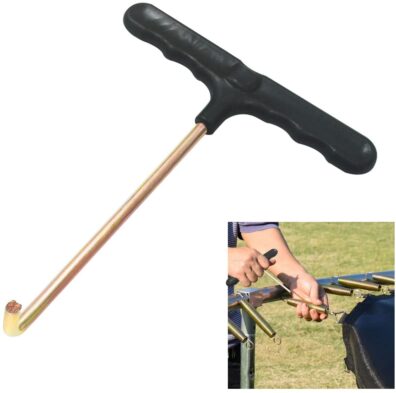
- Spring Puller Tool
- Phillips Head Screwdriver
- Spanner, 10 mm
- Electric Drill
Before you begin the trampoline disassembly procedure, make sure you have all of the tools and accessories listed above. If you don’t have any tools or accessories, we recommend that you get them. This toolset will be handy for setting up and dismantling your trampoline in the future.
WARNING: While the disassembly is taking place, we highly advise you to keep your children out of the backyard. Some portions are hazardous to children’s health. As a result, it’s a good idea to keep your kids out of the backyard throughout the dismantling process.
How to Disassemble a Trampoline: A Step-by-Step Guide
Clean the Trampoline
Your trampoline is ready to be dismantled, but it is filthy. In this case, you should clean the trampoline completely before starting the disassembly. Bacteria, fungus, rust, corrosion, dampness, and other diseases will harm it if you take it down in a dirty state and store it. It will lower the longevity of your trampoline in the end, which is why we recommend cleaning it first and then disassembling it.
Following cleaning the trampoline, double-check the crates in which it will be stored after dismantling. If the boxes are filthy, you should thoroughly clean them. It will last longer if you store your trampoline in clean crates.
Removing The Net, Ladder, and Other Accessories
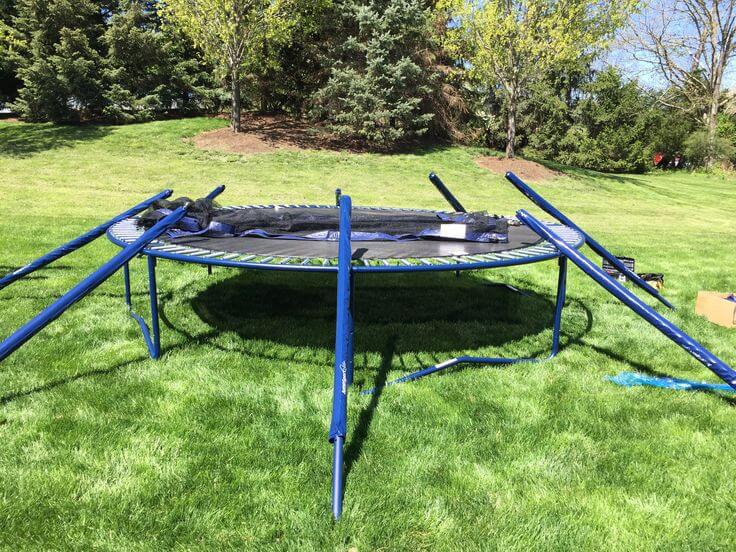
To begin, disassemble the weakest components, such as the net, ladder, and other accessories such as tents, clubhouses, and so on. In fact, the procedures are simple. You may disassemble the net once you’ve taken apart the tent and clubhouse.
You may simply disconnect the net poles if they are directly attached to the frame. Detach all of the poles and place them in the trampoline, then untie the net from the poles’ tops. To increase safety, nets are sometimes fastened to the bottom of the trampoline; you must also lay them down.
If there is a basketball hoop, it must also be untied. After you’ve completed the net detachment, fold it up and store it in the box. Wrapping tapes can be wrapped around the poles to protect them.
You may now disassemble the ladder by simply untying it and placing it in the box. Don’t forget to clean any rust or dirt that has accumulated. You may clean the rust with any of the rust removers. However, we recommend that you choose a non-toxic, water-based option.
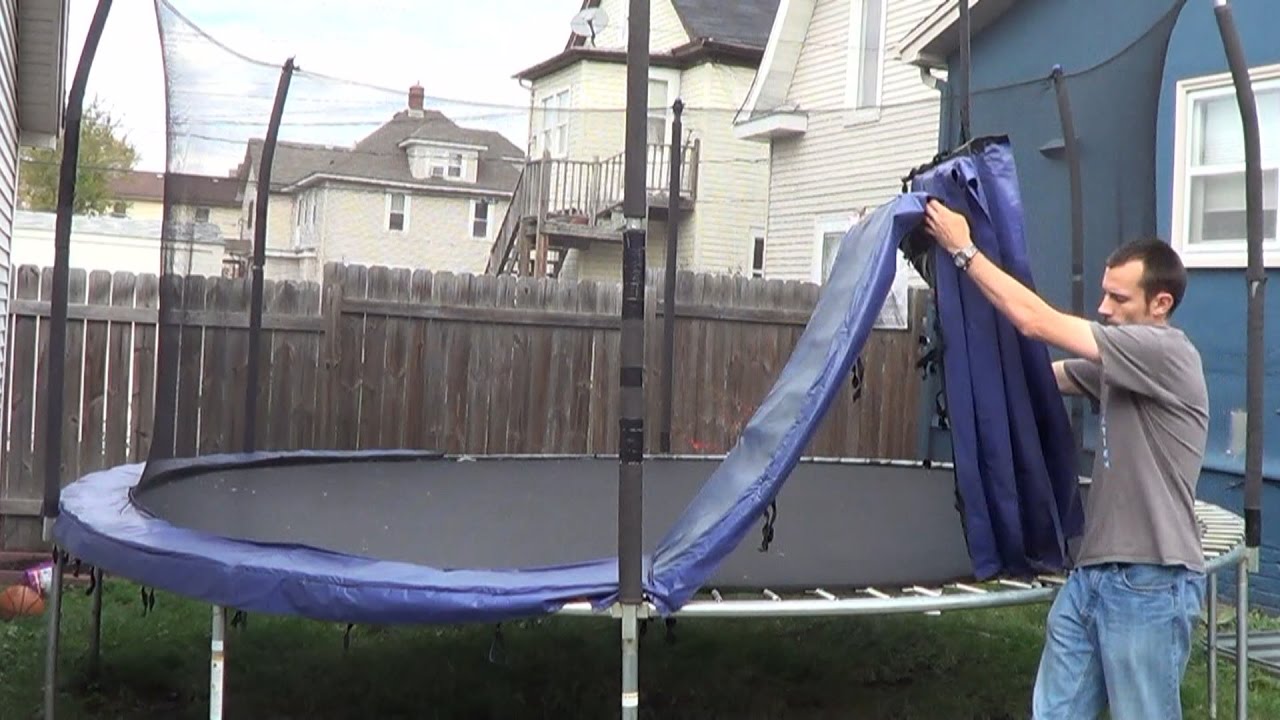
Remove the Spring Cover or the Safety Pad.
The safety pad can be removed either before or after the net is disassembled. The majority of the safety pads are made of a single piece of material and are thin enough to be readily removed from the trampoline.
Untangle the knots beneath the trampoline pads. If a flaw is discovered, mark it with duct tape so that it may be repaired before the next year’s use. Untying the tough knots may need the use of a key. Fold the safety pad and store it in the box after untying all the knots.
It’s now time to dismantle the most difficult component, the springs.
Disassembling The Springs
Many trampoline users tell us that they love trampoline assembly and removal, except the springs. True, removing trampoline springs requires extra effort, but if you understand and use the proper procedure for removing trampoline springs, it will be much easier for you to disassemble them. So, let’s figure out how to detach trampolines’ springs.
Begin by inspecting the springs for damage. You may quickly and smoothly remove the springs since they are healthy and non-rusting. However, removing rusted or damaged springs is a dangerous operation. Hand gloves are required in this situation.
Take your spring tool and choose the first spring you wish to remove. Then, from the mat end, pull the spring hook towards the trampoline’s center. Because the spring will be stretched, loosen it from the mat’s V-ring. Remove the second spring hook from the frame at the same time.
After you’ve removed the first hook, you may disassemble the rest of the trampoline springs in the same way. If you don’t have enough leverage with the spring puller or want to remove the springs quickly, you may alternatively utilize the spring to accomplish it. Before you begin dismantling the spring, you must first understand certain fundamentals. Then you’ll have no trouble removing trampoline springs.
There are two types of end styles on trampoline springs. One has a closed-end that hooks onto the mat’s V-ring, while the other has an open end that clings to the frame. The open-end makes it easier to remove springs quickly. Simply pull the spring hook that is attached to the frame towards your body, and the spring will easily snap off. To utilize the spring puller, simply reverse the process.
Other ways for quickly removing trampoline springs exist. Pliers, screwdrivers, and caulking gun are some of the trampoline spring tool options. So, you’ve learned how to remove trampoline springs both with and without a tool. Place all of the springs in a box.
Folding The Trampoline Mat
After the springs are removed, your trampoline is reduced to a steel frame. The beautiful jumping carpet has already been removed from the trampoline. You must now fold the mat neatly.
You must first straighten the mat on the ground before folding it. The trampoline should then be folded in half first. Fold it in half again and continue the process until it fits inside the storage box. You should inspect the mat before folding it to see whether it has any wear or damage. If you discover a problem, you must fix the mat hole before storing it.
So, with the exception of the frame, you’ve virtually completed the trampoline disassembly. The frame must now be disassembled.
Dismantling The Frame
The trampoline frame is the last component to disassemble in the trampoline disassembly process. Make sure the net, pole, ladder, spring cover, springs, mat, and other parts are all removed before you begin. A Phillips Head Screwdriver is required to disassemble the trampoline frame. You may speed up the process by using a power drill (electric drill).
Simply remove all of the screws from the whole frame using a screwdriver or power drill and store them carefully. You may be able to disassemble the frame and separate the metal parts if you already assembled your trampoline. After you’ve removed all of the screws, you can begin removing the legs from the outer ring. The ring and legs have been linked together; now, you should separate them.
To separate the legs, place one leg in the centre of the leg and press the outer ring upward. We recommend that you proceed with caution, as the steel leg may harm or damage you if it falls on your foot. Detach the outer ring from the T-joints once you’ve removed all of the legs. If two metal parts are stuck together, twist the rings to release them and separate them.
The disassembly operation is completed after all trampoline components, pieces, and accessories have been removed. All of the pieces should be properly placed in the storage boxes, and then all of the boxes should be packed with tap. All of the boxes must be kept in a secure and dry location within your home, basement, or garage.
Congratulations on completing the trampoline disassembly!
Trampoline Dismantling or Re-installation
Our goal in deconstructing the trampoline is to protect it from the elements or reinstall it in a different location.
If you’re a man who disassembles the trampoline to preserve it from snow or extreme heat. Then you won’t have to use it for at least the following six months. As a result, you may keep all of the components in a secure and dry location. If the steel pieces are not retained within, they will be useless for disassembly.
If, on the other hand, your goal in disassembling the trampoline is to move it to a new location, you may do it today with ease. You may need to relocate the trampoline a short distance from time to time. The trampoline does not need to be disassembled in this scenario. You may effortlessly transfer your trampoline to the correct location by following a few simple steps.
Trampoline Storage Tips
Keep the pieces dry and out of direct sunlight. If you simply want to take apart the mat, springs, and safety net, you may only leave the frame outside if it’s built of rust-resistant materials and covered. You should ensure that the structure does not come into touch with dirt or severe weather, which is why a frame cover is strongly recommended. Depending on the size and space available, you may be able to store your trampoline indoors without disassembling it. If this is the case, remember to keep your trampoline horizontal to preserve its equilibrium. However, to avoid needless harm, we recommend dismantling it using our simple instructions.
Frequently Asked Questions (FAQs)
How long does it need to take apart a trampoline?
The length of time it takes to disassemble a trampoline is primarily determined on its size and form. Spring-based trampolines typically take 4 hours to disassemble. Trampolines without springs, on the other hand, need fewer jumps.
How do you dismantle a rusted trampoline?
Removing a rusted trampoline is quite difficult, especially if you are a beginner. To begin, make certain that you are always wearing gloves. When dismantling a rusted trampoline, you must follow a few simple steps.
When dealing with a rusted trampoline, the first step is to untangle the safety pad. Then make your way to the springs. Dismantle just the opposite spring after removing the first. Maintain the pattern until all of the springs have been removed. After that, concentrate on the frame.
Are trampolines easy to take apart?
Yes, trampolines are quite simple to disassemble; in fact, disassembling a trampoline is the exact opposite of building one. It could be simpler if you follow the steps outlined above.
Can you move a trampoline without taking it apart?
You must not attempt to transport the trampoline that has been fully constructed by yourself. It may be extremely dangerous, as well as damaging to your trampoline. It’s OK to pull it up with the aid of three to four persons and transfer it a few feet away within your backyard if you wish to modify its placement by a few feet. You must disassemble it if you wish to transport it a few kilometers away.
Is it possible to fold a trampoline?
You can fold a workout trampoline (rebounder) if you have one. The recreational trampolines are not collapsible, so you’ll have to disassemble them to store them.
Can you disassemble a trampoline without anyone’s help?
Disassembling a trampoline is a straightforward, step-by-step procedure that you can complete on your own. You can do it alone, but it’s best to have someone with you during the disassembly process because two people can safely disassemble a trampoline.
You can disassemble a 5 foot, 8 ft, or 10 ft trampoline by yourself. However, the disassembly of the 12 ft, 14 ft, 15 ft, and bigger trampolines requires at least two people. If you do it alone and make a mistake, your trampoline may be damaged. As a result, we do not advise you to take down a trampoline without assistance.
Conclusion
A trampoline must be disassembled for a variety of reasons. It will keep your trampoline safe from deterioration and may even save you money. When removing the trampoline, be cautious with the springs and frames. Always remember that a hasty dismantling might cause harm to your trampoline; therefore, follow the guidelines mentioned above.
You now know how to take apart a trampoline. As a result, it is your responsibility to pass on these fundamentals to others. Reinstall your trampoline after the winter for new skills and enjoyment!


