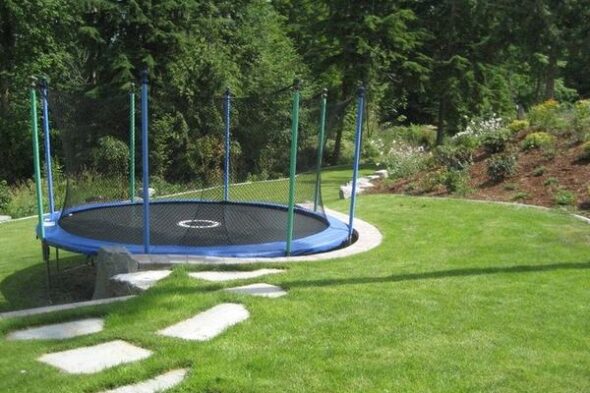
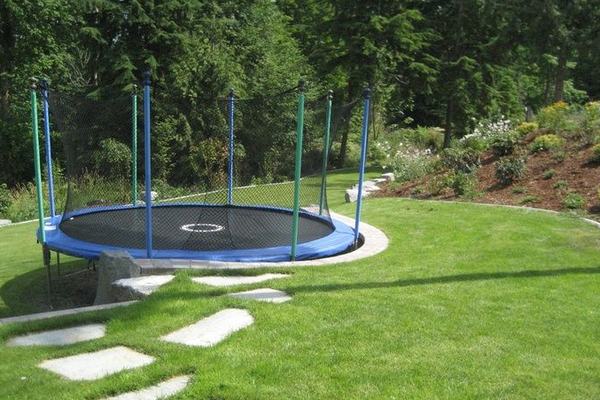
Many customers ask if they can build an inground trampoline on a slope. Yes, to put it simply. In reality, most gardens have some form of slope; yet, installing an inground trampoline into a slope is rather simple.
Determine Your Backyards’ Slope
First and foremost, you must assess the slope of your backyard in order to establish which leveling method will be more accurate there. A wood board, carpenter’s level, and measuring tape are among of the equipment and accessories you’ll need to measure backyard angle.
Place your trampoline in the garden where you want it to stay for the time being. Then, parallel to the slope, place a plank on the trampoline. Place the carpenter’s level on top of the plank as well.
Now lift the plank’s bottom side and look at the level’s bubble. Measure the distance from the trampoline top to the plank top on the downhill side after the bubble is balanced between the two lines.
The trampoline diameter (inch) is then divided by the above-mentioned distance (inch). If the value exceeds 7, the slope is quite steep. In this situation, relocate the trampoline to a position with a lower value than 7. There are numerous techniques to raise the trampoline’s downward side now.
Small Or Steep Slope?
The course of action will differ based on whether the slope is a ‘steep slope’ or a ‘small slope.’
Slight Incline
All you have to do now is dig a bit deeper on the high side and leave the frame sticking out above ground on the bottom end. Allowing your trampoline to follow the slope a little is also an option. It’s not necessary for your trampoline to be perfectly level; a 1 or 2 degree slope would suffice. So that the frame does not protrude from the ground, you may always build up the soil and turf on the bottom side. You’ll have lots of extra soil on hand for this project!
Steep Slope
This will need a bit more effort. You’ll need to slope down on the high side to create a level space a few feet wider than the trampoline’s dimensions. This prevents the trampoline from colliding with the slope near the edge. This will resemble a crescent shape when you grade down from the top side. See the image below.

What To Do If The Terrain Is Uneven?
Working on flat ground or on a hill isn’t always possible. Sometimes, you will be required to work on uneven ground in various locations. On uneven terrain, you still have a few alternatives for your trampoline.
How Do I Dig a Trench?
It’s simple to dig a trench. Simply dig holes where the legs will go using a shovel. The depth of these holes should be the same as the angle of the trampoline, which you measured with the wood plank and the level.
The holes must be excavated on the trampoline’s higher side, since they will reduce the area where the legs sit to the same level as the lower two. Use the wood plank and level method to assess the angle once the holes are drilled well and the trampoline is attached.
If there is no angle, your trampoline is good to go.
Is It Necessary For The Angle To Be Perfectly Flat?
No. You don’t need to be concerned if the angle of your trenches is slightly wrong.
When your children begin to bounce on the trampoline, the legs will dig further into the ground until the trampoline is completely flat. However, if you’ve utilized leveling blocks, your angle should be almost completely flat.
What If I Don’t Want To Use The Other Options and Instead Cut The Trampoline Legs?
You have the option of cutting the trampoline’s legs if you choose.
But, before you do so, make sure you’re completely satisfied with the trampoline’s location, as it won’t operate anyplace else after it’s severed.
Because the trampoline legs are likely constructed of steel, this alternative necessitates the use of a high-quality saw.
Try To Avoid: We don’t advocate this option since you won’t be able to reposition or resell the trampoline because it will remain uneven from now on.
Unpaved Surfaces And Trampoline
Yes, you certainly can! Grass would be the best sort of unpaved surface for a trampoline on legs. This is due to the fact that it gives a solid but supple balance when bouncing. Grass also provides less dampening, enabling the energy to be maintained.
Check to make sure your trampoline’s legs aren’t sinking into the earth. While this shouldn’t be a reason for concern in most cases, you should double-check that it doesn’t slant to the side and instead remains stable and straight. This can be aided by the use of an anchor.
You’ll also want to make sure that your trampoline legs are firmly planted in the ground, as you don’t want them to shift or worse, fall off while your kids are jumping.
On A Slanted Yard, How Can You Safely Install A Trampoline On Legs?
The first question you should ask yourself is whether or not the location is acceptable for installing the trampoline. If it’s too sloppily slopped, you might want to skip that spot entirely.
On the other hand, if the slope isn’t too steep (no more than a 20% gradient), you can keep going. You want to level the ground as much as possible at this point.
Begin by excavating a hole in the earth to support the trampoline leg that is facing uphill. Timber blocks can then be used to stabilize the downhill leg, which has been fixed into the trench.
If the ground is extremely slanted, cutting out a terrace and installing your trampoline there may be the best alternative.
How Do You Safely Install An In-Ground Trampoline On A Sloped Yard
You’re probably aware that working your way around a hill is doable. However, depending on the type of slope, your trampoline installation process may change.
To begin, you’ll need to determine the sort of slope you’re dealing with. Is it compact or steep? Low slopes aren’t as bothersome and don’t need as much effort to fix.
Other Considerations When Installing A Trampoline
#1. Trampoline Anchors Should Be Used
This is advantageous in every sense. This one is certainly a winner, from being able to hold down the trampoline and protect it from blowing off during heavy winds to being able to level the trampoline when the ground is uneven. If ever there was a requirement, this is it.
#2. Avoid Using Your Trampoline On Hard Surfaces
Normally, the trampoline should be set up on soft ground, somewhere where the impact energy may be absorbed.
Hard surfaces, such as asphalt or concrete, should be avoided. If these are your only options, you should try to install some form of soft matting around the trampoline’s entry area.
It’s also a good idea to acquire some rubber feet to put below the U-shaped trampoline legs. This addition will help in the absorption of impact energy even more.
#3. Clear Air Space And The Environment
This is a really good one. Make sure your trampoline isn’t installed directly beneath a tree because you’ll have to keep dirt, leaves, garbage, and bird excrement off it. You should keep your children away from laundry lines and overhead cables to guarantee their safety.
Apart from the air space above, the surrounding region must also be safe and free. Keep your surroundings devoid of sharp things, such as climbing frames or swings, as well as movable equipment such as toys or motorcycles, as well as walls and fences.
#4. Purchase The Correct Size
While a full-size trampoline of 6 feet or more is an excellent choice, if you have children under the age of six, you might want to consider a smaller one.
#5 Pay Attention To Your Trampoline Type
Trampolines come in a variety of shapes and sizes. Then there’s the trampoline that’s built into the earth. This one is normally built on the ground level and flat. Trampoline with legs, on the other hand, is supported by a frame that maintains it upright.
Leveling Kit For Trampoline
Leveling kits aren’t nearly as difficult as they appear. Essentially, you’re looking at a set of clamps that will attach to the bottom of the legs on the frame of your trampoline. These clamps include adjustable feet that may extend and retract as needed to compensate for variations in ground level around the frame’s borders.
If you go this way, my sole recommendation is that you obtain a kit constructed of high-quality material, such as strong gauge steel. Also, if the level difference in your ground is too significant, leveling blocks may be a better option. These kits’ feet can only extend so far.
Leveling Blocks For Trampoline
Again, there’s nothing really fancy or difficult going on here. It’s exactly what it sounds like: a trampoline leveling block. When it comes to leveling blocks, if I could only provide one piece of advise, it would be this:
Don’t rely just on cinder blocks, bricks, or landscape stones to complete your project.
Only use trampoline-specific leveling blocks on your trampoline. They’re reasonably priced, and they have a few distinctive features:
- Because they’re stackable, you may compensate for more level fluctuation without fear of stacked blocks drifting away from one another.
- They’re not only light, but they’re also exceedingly tough.
- They feature grooves in them to protect your trampoline’s legs from moving.
Conclusion
When you put a trampoline on a hill, you risk attracting possible hazard. It is only after going through the rigors of repairing the slope that it is safe to play on. You may secure your trampoline using a trampoline anchor for increased security.
